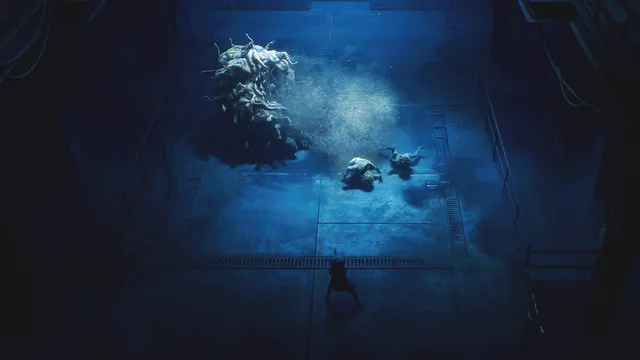
This walkthrough covers the first five parts of End of Abyss: the Outer and Habitation Sectors (boss: Husk Cluster), powering the Reactor (Centipede Husk), the Factory West SCU (Security Sentinel), the Waterworks SCU (Drowned Husk) and the Containment Sector SCU (Radiation Host), where you also get the Radiation Protection Mod and the Grappling Hook. It ends when all three SCUs are online and the Central Elevator works. The Lower Levels and the final boss are summarised in the boss guide. Use the coverage table or the key item list to jump to where you are stuck.
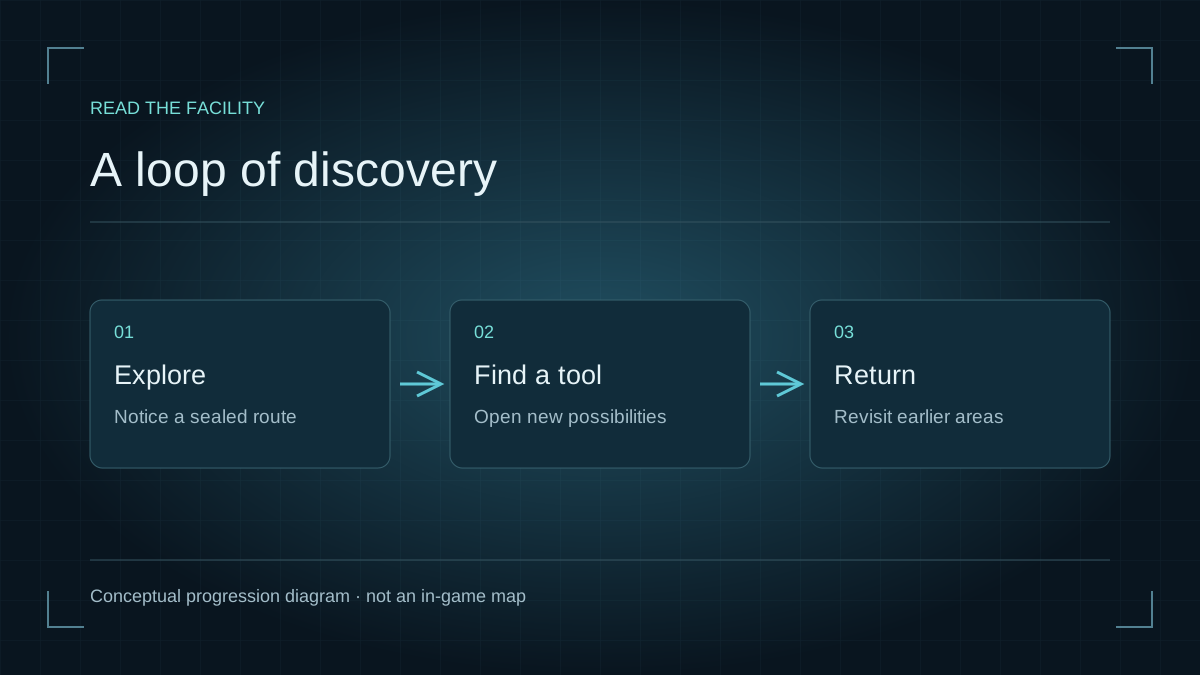
Where are you stuck? Jump to the next objective
| Your current objective | Start here |
|---|---|
| Reach Factory East | Opening and Shuttle route |
| Restore Reactor power | Three Power Cells and Centipede Husk |
| Activate the SCUs | Factory West, Waterworks, then Containment |
| Use the Central Elevator | Lower Levels coverage and final bosses |
| A door or elevator seems broken | Patch fixes before repeating the route |
| Find missed items after credits | Logbook checklist and secret ending |
This guide gives detailed steps through the third SCU; the Lower Levels section is a summary. Use the coverage table to see where detailed instructions end. Budget a first run using story and completion times.
What this walkthrough covers
The route below follows the order of Into Indie Games' five-part walkthrough, rewritten as short numbered steps. Each part lists where it starts, the goal, the items you need and where the part ends.
| Part | Goal | Boss | Ends at |
|---|---|---|---|
| 1. Outer & Habitation Sectors | Reach the Shuttle | Husk Cluster | Shuttle to Factory East |
| 2. Powering the Reactor | Activate three Power Cells, restart the Reactor Core | Centipede Husk | Regroup with the crew |
| 3. Factory West SCU | Activate the first SCU | Security Sentinel | Back at the Central Elevator |
| 4. Waterworks SCU | Activate the second SCU | Drowned Husk | Second SCU online |
| 5. Containment Sector SCU | Activate the third SCU | Radiation Host | Central Elevator operational |
| After the Containment Sector | Lower Levels and the ending | Failed Experiment, Fractured Being | See the boss guide |
Save points are called Restoration Pods in game. They heal you, save your progress, refill your Health Boosters and let you change Suit Mods. A Restoration Pod and a Workbench together make a Safe Room. Fragments are the currency for crafting and upgrades, and Complex Alloy is the main weapon upgrade material.
Key items and where to find them
If a door or bridge is blocking you, check this table first. Scan the obstacle so the map tags it (see the Scanner guide), then fetch the item listed.
| Item | Where to get it | What it does |
|---|---|---|
| Worker Access Keycard | Habitation Sector, end of the air vent route (Part 1) | Opens the keycard door near the start of the sector |
| Block B Keycard | Habitation Sector, room off the passageway (Part 1) | Opens the Block B area |
| Power Converter | Below a broken railing under the tower top (Part 1) | Powers the offline Power Conduit |
| Riot Breaker | Small room by the Shuttle Control Room (Part 1) | High-damage weapon with limited, craftable ammo |
| Factory Keycard | By a body at the locked Reactor Core door (Part 2) | Opens the keycard room near the Factory East safe room |
| Mechanical Crank | Factory West, past the Maintenance area (Part 3) | Lets you extend bridges at bridge panels |
| Explosive Charge | Factory West, behind the Security Turret Type B fight (Part 3) | Blows open Weak Structures |
| Supervisor Key | On a body behind an Energy Node Door (Part 4) | Unlocks the second Waterworks entrance |
| Operations Key | Waterworks workshop past a Husk Brute (Part 4) | Picked up before the boss; the source does not say what it opens |
Health Boosters: the first is on the floor by the first Restoration Pod (Part 1), the second is on a body in the Ventilation Tunnels (Part 2) and the third is in an Item Box under a trapdoor in Factory West (Part 3). Every boss in these parts also drops a Vault Key, which opens one of the eight Vaults holding Suit Mods. Weapon pickups are tracked on the weapon locations page.
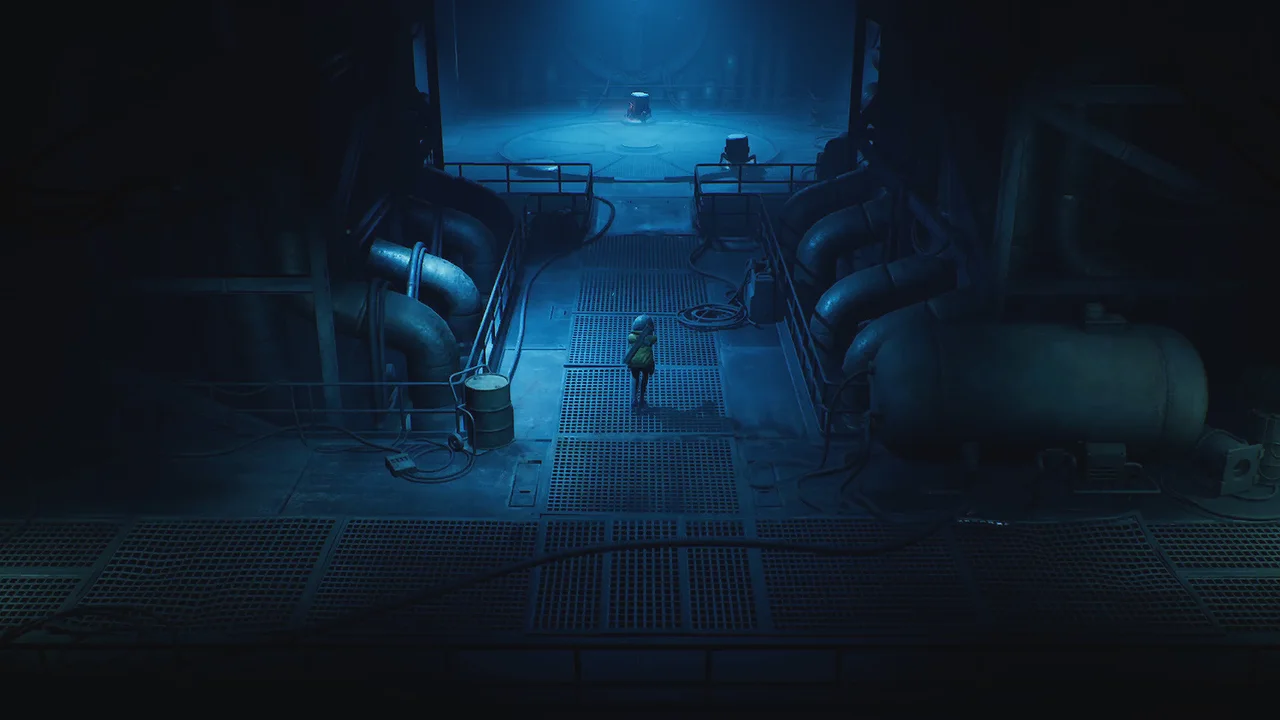
Part 1: Outer Sector and Habitation Sector
- Start: the opening cutscene. The crew takes the elevator down and leaves Cel behind with Soldier E19.
- Goal: reach the Shuttle and take it to Factory East.
- Items you need: Worker Access Keycard, Block B Keycard, Power Converter. You also pick up the Riot Breaker, your best weapon for the boss.
- Boss: Husk Cluster.
1.1 Follow Soldier E19 to the Habitation Sector
- Follow Soldier E19 through the first door. At the broken bridge, go up and pull the lever to extend the second bridge.
- In the room with a door locked from the far side, the game teaches the Scanner. Drop through the large hole in the floor.
- Break the crates on your left, go outside, jump down the ledge and crawl into the gap on your right.
- Break the crates at the other end and climb the ladder. You are now behind the locked door; pull the lever on the left to let E19 through.
- At the Energy Node Door, scan to trace the yellow line to its Energy Node, then shoot the node to open the door.
- Ride the elevator down, keep going forward and open the door at the end of the passage to enter the Habitation Sector.
1.2 Get the two keycards
- After the cutscene, note the door on your right. Its reader needs the Worker Access Keycard.
- Go up into the room on the right, next to the large Habitation Door. It holds the first Restoration Pod and a Workbench that is still offline. Pick up the Health Booster from the floor.
- Take the door on the right and collect the Fragments on the ground.
- In the next room, before taking the door straight ahead, go down and left to open a shortcut.
- Follow the main path to a stairwell and climb to the second floor. Go down and right here for a second shortcut.
- At the cafeteria, a body is propped against a door with something knocking behind it. Ignore it and go up through the door on the right.
- At the storage room at the end of the passage, open the Ventilation Cover and crawl in. A side room in the vents has more Fragments.
- The vents end in a room with two Infected Workers. Kill them and pick up the glowing Worker Access Keycard.
- Leave by the upper door on the right to rejoin the earlier passageway. Go up, enter the room on the right, kill two more Infected Workers and take the Block B Keycard.
- Optional: climb the stairwell to Block B for Notes and Fragments, guarded by more monsters.
1.3 Open the Habitation Door and restore the map
- Go back to the Habitation Door. A short cutscene plays; then open the door with the keycard and follow E19.
- Go down the stairs to regroup with the crew. The captain asks you to bring the system online: interact with the cube ahead to activate the SCU.
- Go upstairs through the main door to the Communications Center Control Room and talk to Soldier C12.
- Use the control panel on the left to Retrieve Map Data. This reveals the zone map; see the map guide for how the map works.
- The door on the left leads to a Workbench, now online, and a Restoration Pod. Save before moving on.
1.4 Climb the tower
- Walk past Soldier O14 and down the stairs into the Array Chamber. The goal is the top of the tower.
- Cross the steel walkway and climb the ladder. Here you meet the first Parasitic Fleas, which latch on and drain health; one knife swipe kills each.
- Fight through the narrow passage and up the next ladder. On the walkway beyond, the elevator on your right unlocks the eastern exit to the Communications Room.
- Walk on past a ladder you cannot use yet, through the door, clear the Array Chamber and leave through the far door.
- In the next room, an Infected Worker drops from the ceiling behind you as you climb the steps. Turn back and kill both enemies before they pin you, then take the ladder up.
- The door here leads to a dark room with Fragments. Then keep climbing until a long ladder takes you to the top.
- At the top, one Power Conduit in the array is offline. You need a Power Converter.
1.5 Find the Power Converter
- Go through the door at the top and pick up the Flares in the passage. They distract enemies and light dark spaces.
- Go down the stairs, through the door, and down the ladder to the lower floor.
- Jump off the broken part of the railing and pick up the glowing Power Converter below. Enemies ambush you as soon as you take it.
- Go down and left through a door to another steel walkway. The door at its end leads to the big ladder up to the Power Conduit.
- Insert the Power Converter and activate the system to power the Beacon.
- Climb back down to the steel walkway, take its ladder down and activate the second ladder there.
- Take the elevator on the right and follow the passage back to the Communications Room. Talk to Soldier C12.
1.6 Unlock the Shuttle Entrance
- Run back to the Habitation Sector. C12 calls as you near the Shuttle Control Room; take the door on your left.
- Clear the enemies, then vault through the open window on your right into the control room.
- Pull the lever to open the main door and pick up the Riot Breaker in the small room. Unlike the Pulse Gun, its ammo runs out and must be crafted.
- Go through the door on the right and use the terminal to unlock the Shuttle Entrance. The large door outside is now open.
- Before going in, rest at the Habitation Sector Restoration Pod (down and right) and craft as much Riot Breaker ammo as you can.
- Go through the Shuttle Entrance, kill the enemy ahead and walk down the steps to start the boss fight.
Boss: Husk Cluster
- A large, slow mass of Husks. Its only attack is a jump, which you can dodge cleanly.
- The danger is the extra Husks it keeps spawning. Kill them quickly or you will be overwhelmed.
- Point-blank Riot Breaker shots take big chunks of its health. Heavy damage makes more Husks spill out, so be ready to deal with them.
- Pick up the Vault Key it drops. More tactics are in the boss guide.
Next: go into the room on the right and call the Shuttle. It takes you to Factory East.
Part 2: Powering the Reactor
- Start: stepping off the Shuttle in Factory East.
- Goal: reach the Reactor Core, activate the three Power Cells beneath it, turn the power back on and restore communications.
- Items you need: Factory Keycard. You also pick up a second Health Booster, Grenades and Complex Alloy.
- Boss: Centipede Husk.
Press previews described this objective as activating three "power cores". In this walkthrough's source they are the three Power Cells under the Reactor Core. See Power Core locations for related details.
2.1 Get the Factory Keycard
- C12 tells you the Reactor is to the east. The room on the right of the steel walkway is locked from inside. A new weapon is in there, but you cannot reach it yet.
- Enter the room on the right further along. It has a Safe Room with a Restoration Pod and Workbench, and a room near the bottom that needs the Factory Keycard.
- Go up, loot the Item Box for Fragments and take the doorway on the right. Kill the Infected Worker and continue through a large door that opens as you approach.
- Follow the main path to the Reactor Core door, which is locked. Pick up the Factory Keycard beside the body and scan the note on the panel. C12 tells you to find another route.
- Return to the Safe Room area and take the door on the left by the ladder for a Complex Alloy and Fragments. Note the Weak Structure on the left wall; you can open it later with an Explosive Charge.
- Save if needed, then head deeper into Factory East through the door on the right at the bottom of the area.
2.2 Reach the Ventilation Tunnels
- Go down the stairs; Cel switches on her flashlight. Go down, then follow the path right.
- The large room under the pipes is full of Infected Workers. Go down, turn right and find the open door at the far right, down a few steps.
- Climb the ladder behind it, fighting off monsters on the way, and take the door on the left.
- Follow the steel walkway and turn right at the fork.
- In the small room, kill the enemies below you and scan the note. Then take the door on the left.
- You come out above the Safe Room. Extend the ladder for a shortcut, then take the door on the right of the upper section.
- Follow the path into the Ventilation Tunnels.
2.3 Through the tunnels to the Reactor Core
- The tunnels link many parts of the facility, but only part is open now. Only Parasitic Fleas live here, so it is safe to explore.
- Kill the Fleas and loot the body to get the second Health Booster, which lets you heal twice. A ladder here leads to another part of Factory East; you do not need it yet.
- Follow the path to the Reactor Core and climb down the ladder. Pick up the Grenade on the way; it deals High Impact damage and can be crafted.
- Go forward and up through the door. The door on your right is another Safe Room.
- Continue along the main path for a cutscene at the Reactor Core. Go through the door at its base and take the elevator up.
- The control panel fails to boot the Reactor. C12 asks you to start the Power Cells below by hand; they are now marked on your map.
2.4 Power Cells one and two
- Go back down the elevator, loop around the Reactor walkway and take the second elevator down.
- In the dark passage, loot the body for Fragments and go right to the first Power Cell. Activate it and loot the Item Box.
- Go back and follow the path. A locked door with red lights hides the third Power Cell; it needs the Security System.
- Go left. At the next locked door you see a centipede-like creature crawling on the wall. It does not attack.
- Continue to an elevator. Take the door just past it first to reach the second Power Cell, activate it, then come back and ride the elevator down.
2.5 Unlock the Security Doors
- Leave the elevator and go right. A Safe Room sits in the bottom-right corner; check its locker for Fragments, then take the upper door on the right.
- The route is straightforward but crowded. Move slowly and shoot bodies on the floor in case they are monsters. Shoot the tank on an Infected Reactor Worker's back to make it explode.
- Grab the Small Fragment Chunk and take the door on the right.
- In the next room, two Husks spawn behind you if you rush in. Take a few steps, then back off when they appear so you can fight them one at a time.
- Near some steps heading left there is an open door on your right. Take the left door first: two Chest Huggers attack. They have a heavy grab and are weak to High Impact damage, so use the Riot Breaker or a Grenade. A Fragment Chunk is at the far right.
- Leave, go down the steps, clear the enemies (one is a Chest Hugger) and take the door at the end.
- At the fork up a few stairs, go left first. Cross the room over the water and pull the lever to open the left door, a shortcut back to the Safe Room.
- Return to the fork and go down. Loot the body, take the left door, and kill the Infected Reactor Worker playing dead past the steps and another on the bridge.
- Take the bottom-left door to collect the zone's Map Data.
- Exit, go up and through the door on your left to a large dark room. Husks ambush you near the upper door; use the shelves as cover and keep moving. The door is locked.
- Go back to the previous room, where a Husk bursts out of a vent. Drop down the hole it came from and follow the path left to the far side of the locked door.
- Use the terminal to unlock the Security Doors.
- Go through the newly unlocked door on the left and up the ladder. The room on the right has an Item Box with Complex Alloy.
- Head right from the ladder to the room where you got off the elevator. Save, stock up on ammo and ride the elevator up.
- Enter the red-lit Power Cell room and activate the third Power Cell. The boss fight starts.
Boss: Centipede Husk
- Phase 1: it mostly stays out of sight and scuttles across the arena. Standing in its path knocks you down.
- Its three attacks are a trampling charge, a double ground slam, and a coiling grab that does huge damage. The grab is clearly telegraphed, so dodge every attack.
- Stand in the middle of the arena and fire the Riot Breaker as it passes. Grenades are hard to land; the best moment is the first half of its slam.
- Phase 2: it goes briefly invulnerable and opens with a poison spit, which joins its other attacks. It no longer leaves the arena, so you can shoot it at any time.
- Stay behind it, roll away from attacks and keep firing the Riot Breaker or use the Knife. After the fight it splits in two and escapes. Take the Vault Key.
2.6 Restart the Reactor and regroup
- Return to the Reactor Core and use the control panel. The power comes back on.
- Go back down the elevator. C12 tells you to regroup in Factory East. Save at the Safe Room.
- Further on, two Security Pod Type-As ambush you. They are weak to EMP, so the Pulse Gun's Charged Shot works well.
- Take the door on the left to reach the locked Reactor entrance from earlier. Go back to the Safe Room area and take the door at the bottom.
- Go down the stairs and head to the bottom-left corner for a cutscene.
Next: you meet the crew at the Central Elevator, where Part 3 begins.
Part 3: Activating the Factory West SCU
- Start: the Central Elevator, after regrouping with the crew.
- Goal: the captain needs three SCUs active to power the Central Elevator. The closest is in Factory West.
- Items you need: Mechanical Crank, Explosive Charge. You also find the third Health Booster.
- Boss: Security Sentinel.
3.1 Get the Mechanical Crank
- Take the door on the left into Factory West. In the large tunnel, the door on the left is locked from the far side; it is a shortcut for later. Head down and follow the path.
- In the next room, a Security Turret appears with two Security Pods. The turret is stationary and fires a laser in a straight line, so strafe around it.
- Continue down the passage and right into Maintenance. Climb the ladder and take the door on the left.
- Kill two Security Pods. The elevator on your left does not work yet. Loot the Item Box for an Energy Cell and go through the door down the steps on the right.
- The right-hand door is a dead end. There is a Safe Room just below you and a Weak Structure in the floor; the main route is the door at the top.
- Fight three Security Pods past the top door. An Item Box on the left walkway has Fragments. Take the door on the left at the far end.
- Pick up the Mechanical Crank. It lets you extend bridges. Use the nearby control panel to extend this bridge.
- Go back to the fork after the Security Turret fight and take the left path this time.
3.2 Activate the Factory West Shuttle
- Go up the stairs and use the Mechanical Crank to extend the bridge.
- A door across a gap has no bridge panel on your side. Take the door on the left to a Safe Room instead.
- Leave through the Safe Room's other door and follow the walkway, killing a Security Pod and some Parasitic Fleas.
- The upper door needs the Executive Level Access Keycard, which this walkthrough does not cover yet. There is also a Weak Structure up on the left. Take the open doorway at the bottom left.
- The door on the left is blocked from the other side, so go down and then right to an Energy Node Door with three nodes.
- Scan to find the nodes. Two are in this area. For the third, take the bottom-left door into a dark, infested area: down the steps, up the passage, then into the room on the left. Watch for Infected Workers.
- With all three nodes destroyed, go through the Energy Node Door to a big room. The area on the left has Fragments, a Note and a Weak Structure, but also a Latcher. Go down the steps on the right and kill two patrolling Security Pods.
- The door up the steps on the right is a dead end. Shoot the Explosive Container by the crates to expose a Ventilation Cover.
- Crawl through the vent to the far side of a bridge and pull the lever to connect it to the previous room.
- Go right and take the elevator up. A Security Pod is fighting a Husk; kill both and take the doorway on the right.
- Follow the path to the Shuttle area and pull the lever to activate the Factory West Shuttle.
3.3 Get the Explosive Charge
- Return to the room where the Security Pod fought the Husk and go left along the upper floor. Use the bridge panel to extend the bridge.
- Kill the Latcher and the Infected Worker ahead.
- The walkway leads to the upper floor of the earlier Safe Room. Extend the ladder, take the upper door and use the panel to bridge across to the door that had no panel.
- Go down to the Safe Room, leave by the lower door on the right, cross the bridge and go through the door ahead.
- This is the second Security Turret fight: four Security Pod Type-As and a turret, then a Security Turret Type B. It throws three grenades that explode after a short delay. Get close and it can be baited into hitting itself.
- The door on your left unlocks. Take the Explosive Charge from the table. It is a consumable that opens Weak Structures.
- Go back out, place a charge on the Weak Structure above you and set it off. Collect the zone's Map Data from the terminal inside.
- Optional: go left to a broken bridge, where a large shadow moves in the distant tunnel, and grab the Fragments.
- Return to the room on the right and follow the path right. It loops back to the Factory West entrance.
3.4 Third Health Booster
- Go back to the Safe Room just before the second Security Turret fight. Leave by the lower door on the left, cross the walkway and kill the Security Pod.
- Blow open the Weak Structure on the left with an Explosive Charge. Kill the Latcher in the control room and take the door on the left.
- In the large room, skip the upper-right door; it is locked from the other side and going near it brings a group of Security Pods. Take the left door up the steps instead.
- Kill the Security Pod, break the crates and open the trapdoor. Climb down and loot the Item Box on the left for the third Health Booster.
3.5 Reach the next Safe Room and open the shortcut
- Go up the passage and enter the air vent on the right.
- Go up the stairs and down again. Open the door on your left for a shortcut to the previous area, then take the doorway on the right.
- Kill two Type-A and one Type-B Security Pods. The Safe Room is in the bottom-right corner; save there. The upper-right door must be opened from the other side.
- Climb down the ladder in the area where you just fought and keep running right. Ignore the passage heading up; take the steps on the right and the door there.
- Go up the stairs and through the door on the left.
- Before taking the door ahead, go down the passage for a Complex Alloy and a Note.
- Take the door on the left and blast the Weak Structure in the floor with an Explosive Charge.
- Before dropping down, unlock the door on the left. It connects back to the room where you fought three Security Pods and its Safe Room. Save and restock for the boss.
- Jump down the hole and go left. The giant door opens as you approach and the boss fight begins.
Boss: Security Sentinel
- A robot weak to Armor-Piercing and EMP damage. It is hard from range and much easier up close.
- At range it fires a laser after a short charge-up or a few homing missiles. Both are easy to dodge.
- Up close it charges an EMP blast that knocks you back and hits hard. A well-timed dodge avoids all of it.
- Stay close so it keeps using the EMP, and fire the Pulse Gun's Charged Attack. If you have the Security Rifle, its Armor-Piercing rounds do heavy damage; see weapons.
- Phase 2 adds no new attacks, but each one gets stronger: the EMP sends out a shockwave, the laser lasts longer and the missiles gain an extra projectile. Same plan; take the Vault Key afterwards.
3.6 Activate the SCU
- Take the door on the right, follow the tunnel and enter the passage with a door at the end.
- Open the door with the panel and activate the Factory West SCU.
- Back in the tunnel, keep going right and extend the bridge with its panel. This links to the first tunnel, and you can run straight to the Central Elevator.
Next: the second SCU is in the Waterworks, reached through a door in Factory East.
Part 4: Activating the Waterworks SCU
- Start: after the Factory West SCU. Part 3 ends at the Central Elevator.
- Goal: activate the second SCU, inside the Waterworks.
- Items you need: Supervisor Key (for the entrance used here), Mechanical Crank, Operations Key.
- Boss: Drowned Husk.
There are two ways into the Waterworks. The closest is through the bottom-left corner of the Husk room in step 1, but the source does not walk through it. The steps below use the second entrance, which needs the Supervisor Key. The closer route leads to the second Safe Room you unlock in step 4.3.
4.1 Get the Supervisor Key and enter the Waterworks
- Leave through the exit on the right and keep heading east to a room full of Husks. Kill them and go down.
- Go right along the walkway, fight through and take the doorway ahead. You reach a ladder and a path further east. That path leads to the second Waterworks entrance, which needs the Supervisor Key.
- Climb the ladder and follow the passage right. Kill the patrolling Security Pod Type-A.
- Scan the Energy Node Door on the right, trace its lines and destroy the nodes. Search the body inside for the Supervisor Key.
- Go back down the ladder and take the passage on the right to a door up a few stairs. Open it with the Supervisor Key.
- Inside, a ladder goes down to the Waterworks. First climb the nearby ladder up to a Safe Room and save.
4.2 Reach the Waterworks Safe Room
- Climb down and take the door on the left into a huge chamber. Ignore the control panel on the left and go straight down to the next room.
- In the chamber with large water tanks, go up the steps on the right and through the door.
- Cross the bridge to the door at the far end. You can skip the path below for now.
- Use the Mechanical Crank to extend the inactive bridge and cross.
- Kill the Latcher and the Husk in the next room.
- Go up. The door on the far left is a shortcut back to the entry ladder; open it, then take the door on your right.
- Clear the enemies. The Safe Room is through the door on your right at the bottom of the steps.
4.3 Get the Operations Key
- Craft as much Riot Breaker ammo as you can before leaving the Safe Room.
- Take the door on the left across the walkway. It locks behind you for a wave fight; keep the central railing between you and the enemies until the doors reopen.
- Go through the door on the left. The panel across the bridge lowers the water below; there is a glowing item down there to grab later. Use the panel and take the door beside it.
- Cross the large overflow well to the door on the other side, then take the first door on the left in the next room.
- This dark, flooded area has narrow passages and two new enemies: Parasitic Worms, which latch on, and the Leechgut, a tougher Husk that hits very hard up close.
- In the large room ahead, clear the enemies. The two doors on the left hold a Complex Alloy and the zone's Map Data. Then take the bottom-right door.
- Kill the enemies, including a Latcher, and take the door that leads down and left. Follow the passage and go left at the fork.
- Go under the bridge and left to a platform you can climb onto. Watch for a Leechgut in the water.
- Once out of the water, take the first door on the right. The corridor ends at a Safe Room; pull the lever to unlock it. This is the Safe Room the closer entrance leads to.
- Go back and take the door in the far right corner. A Husk Brute, even deadlier than a Leechgut, guards it. Kite it around the railing on the left side and shoot from a safe distance.
- In the small workshop behind the door, take the Operations Key from the table and return to the Safe Room you just unlocked.
4.4 Reach the boss arena
- The arena is a short run away, so prepare now. Bring the Riot Breaker and Grenades. Leave by the door on the right.
- Go down and right through the flooded passage and climb onto the walkway.
- At the canal, go down the stairs and jump in from the broken railing. Go up and climb onto the walkway on the right.
- Kill the nearby enemies, climb the stairs and take the door across the bridge.
- Go down both ladders to the bottom section, run around the walkway and take the ladder down again.
- Walk through the broken section of wall to start the fight.
Boss: Drowned Husk
- A melee boss that dives at you and has a powerful grab. It can do nothing if you keep your distance.
- Every attack, the grab included, can be rolled through with good timing.
- Wait for the dive, roll behind it and fire the Riot Breaker at close range. Missed attacks leave it open.
- When it is staggered, move in and interact to stab it with the Knife for heavy damage.
- Phase 2 starts at half health, when it tears a pipe from the wall. The pipe has long reach, so roll sideways or through the boss instead of backwards, then keep kiting and attacking. Pick up the Vault Key once it is defeated.
4.5 Activate the Waterworks SCU
- Take the door in the far-left corner of the arena, climb the ladder and follow the passage to a control panel. Activate it to stop the water flow.
- Leave by the door on the right and drop the ladder to open a shortcut.
- Use your map to get back to the canal from earlier. Get in and head up; with the water stopped, the upper section is now reachable.
- Take the door on the left and go down the ladder. Follow the path to an elevator and ride it down the overflow well.
- Open the door at the bottom to enter the SCU room. Open the inner door with the panel and activate the Waterworks SCU. This is the second of three.
Part 5: Activating the Containment Sector SCU
- Start: the eastern Safe Room in Waterworks, after the second SCU.
- Goal: activate the third and last SCU so the Central Elevator works.
- Items you get: Basement Keycard, Radiation Protection Mod, Grappling Hook, Containment Sector Map Data, Containment Service Key, an Energy Cell and a Vault Key.
- Boss: Radiation Host.
5.1 Reach the Containment Sector
- From the eastern Waterworks Safe Room, run through to the platform and use the right-hand panel to lower it.
- Cross, climb the stairs and use the second panel to lower the dam. Go back to the first panel to open the path below on the right, then take the ladder down.
- Follow the irradiated passage and climb the ladder into the Containment Sector. C-12 warns you about radiation. Save in the Safe Room on the right.
- Go left, ignore the side path, take the door at the end on the right, climb the stairs and run right. Kill two Infected Workers (one has a shield) and use the panel to unlock the Containment Sector Shuttle.
5.2 Get the Radiation Protection Mod
- Head back past the Safe Room and go left. At the exit to Factory East, pick up the Basement Keycard by a body and use the panel to extend a bridge shortcut.
- Cross, pull the lever to open the big door, and keep left. Clear the Security Turret encounter to unlock the doors.
- Take the ladder down past the doorway, go right to where you used the Supervisor Key to enter Waterworks, then down the stairs and ladder.
- Open the door with the Basement Keycard. Kite a Husk Brute and four Infected Reactor Workers in the combat room.
- Through the left door, buy the Radiation Protection Mod for 4 Energy Cells. It is the only mandatory Suit Mod. Equip it at a Restoration Pod, then take the Factory East Shuttle back.
5.3 Second Safe Room
- From the Shuttle room go left into the large circular doorway and take the left opening. Kill the Burster from range and enter the room on the left.
- Kill a Husk and two Glowticks, take the bottom-left door, then clear a Spitter and a Burster and climb the left ladder.
- Open the shortcut ahead, pull the wall lever on the right, go down the ladder and follow the long overlooking passage.
- An Armored Mass appears on the stairs. Dodge its charge so it hits the wall, then shoot its back.
- Take the elevator down, go left, clear the Glowtick room, climb the ladder, go up the stairs and through the hole in the wall. The second Safe Room is on the right.
5.4 Grappling Hook and Map Data
- Leave by the left door, kill the Corroder, take the radiated path right and the door at the top of the stairs.
- Kill a Latcher and a Spitter, go up and through the door, then drop through the broken floor to start a gauntlet of Spitters, Husks and a Corroder.
- Take the right door after the fight to pick up the Grappling Hook.
- Use it to pull down a ladder, scan the Note in the control room and leave by the right door. Pull the lever upstairs to activate two Anchor Points and grapple across.
- Back in the room where you met the first Spitter, use the bottom-left Anchor Point, clear the room, go upstairs and download the Containment Sector Map Data from the terminal.
5.5 Third Safe Room and the bridge puzzle
- Follow the passage under the stairs (corrosive fumes hurt), grapple over the gap and take the upper-left door back to the first Corroder area.
- Go far left, pull the ladder down with the hook and pass through the hole into the heavily irradiated zone. Skip the shortcut to the Reactor and go up.
- Take the far-left door, kill the Infected Reactor Worker and reach the bridge puzzle room. Use your side's panel, cross, use the upper panel to raise bridges two and three, cross the marked bridge and retract the third bridge.
- Climb the stairs, drop off the ledge and enter the third Safe Room on the right.
5.6 Containment Service Key and the lower section
- Opposite the Safe Room, two Armored Masses attack on a long bridge. Beat both to unlock the doors.
- Take the left door, kill the Corroder upstairs and use the panel past it to activate the Anchor Point. Grapple over and shoot the body on the railing for the [Containment Service Key](/guides/containment-service-key).
- Drop down, use the panel, go through the hole on the right and use the overlook panel to activate the Anchor Points below. Ride the elevator to open a shortcut to the third Safe Room.
- In the bridge room, cross the second bridge and use its panel to extend the third. Drop off the ledge, grapple across, take the ladder down and cross.
- Grapple across the next gap, kill the Glowticks and shoot the body above for an Energy Cell. Continue right, kill the worker and Glowticks, and climb the ladder.
- Pull the easy-to-miss lever after the ledge to raise a lower bridge. Cross, climb, pull the lever by the left door for a shortcut, then hook the lever across the gap to extend the bridge.
- Past the containment tank where Glowticks drop in, the elevator opens a shortcut near the second Safe Room. Restock and save there.
Boss: Radiation Host
- Go down the stairs and through the broken wall. The Glowticks on the boss heal it, so pull them off with the Grappling Hook and kill each with the Knife.
- Once no Glowticks are left, keep your distance and shoot. Its charge leaves a radiation zone; its melee is slow. Grenades work well.
- Take the Vault Key, go through the right door, down the ladder and along the corridor. Open the SCU door with the panel and activate the third SCU.
- C-12 reports that the Central Elevator is operational. Part 5 ends here. Full fight breakdown: Radiation Host guide.
After the Containment Sector
With all three SCUs online, the Central Elevator takes you to the Lower Levels. This last stretch is not written up step by step here yet. What is confirmed:
- The Incinerator is in the Lower Levels. It burns Parasitic Growth walls, which hide the route, a keycard and two Data Shards.
- The Failed Experiment waits in the Neural Chamber and is very weak to fire. It drops the Neural Chamber Access card.
- The final boss, the Fractured Being, is north of the Neural Chamber. Read the secret ending guide before you fight it.
- The Executive Level Access Keycard for Factory West is in crates in Outer Sector B2.
- Optional bosses and their Vault Keys are listed in the boss guide.
Frequently asked questions
How do I open the Energy Node Doors?
Scan the door and follow the line it shows to each Energy Node, then shoot every node. The first door has one node; the Factory West door has three, one of them in a dark side area.
Where is the Mechanical Crank?
In Factory West, past Maintenance and a room with three Security Pods. See step 3.1.
How do I break Weak Structures?
With an Explosive Charge. You get the first one after the Security Turret Type B fight in Factory West (step 3.3). Every breakable wall and floor on that route: Weak Structures guide.
How many Power Cells does the Reactor need?
Three, all below the Reactor Core. The third sits behind a door you open from the Security System terminal, and activating it starts the Centipede Husk fight. See Part 2.
Is this a full walkthrough?
Almost. It covers the opening through all three SCUs. The Lower Levels and final boss are summarised after Part 5 and in the boss guide. For the game's total length, see how long to beat.
Where is the Grappling Hook?
In the Containment Sector, past the second Safe Room. See step 5.4 or the Grappling Hook guide.
This page only uses details from official store pages, developer statements and hands-on press previews. Anything unconfirmed before the October 1, 2026 launch is left out and will be added once verified. Last research pass: October 15, 2026.
Sources
References and further reading for this article.
- Into Indie Games — End of Abyss walkthrough and guides hub
- Into Indie Games — Part 1: Outer Sector and Habitation Sector
- Into Indie Games — Part 2: Powering the Reactor
- Into Indie Games — Part 3: Activating Factory West SCU
- Into Indie Games — Part 4: Activating Waterworks SCU
- Into Indie Games — Part 5: Activating Containment Sector SCU